

 These little chickpea fritters are known around the Middle East, Turkey, Greece and other countries, as a tasty street food. Every country has its own version, but aside from Egypt, where the dish is made with Fava beans, all others use chickpeas as the base for the dish.
The recipe here follows the Israeli version, which was introduced by Yemenite Jews. To this, other flavors were added with time, such as the spicy Moroccan Harissa (red hot peppers paste) and other seasonings.
The fried balls are usually served in Pita bread, with fresh or cooked salads, pickles, and Tahini sauce on top, which makes them a perfect quick lunch.
They can also be served on top of a fresh salad, or, as shown here, as a light snack, served with lemony Tahini dipping sauce.
In any way you choose to serve them, I’m sure you’ll enjoy the crispy crust and the spicy and fresh inner layer.
A few notes:
* The chickpeas are soaked overnight, so you need to start your preparations a day ahead.
* The chickpeas are NOT cooked. Cooked chickpeas (or canned) are NOT suitable for this recipe.
* I prefer to grind the mixture coarsely, for a very crispy texture. If you prefer a smoother one, you can grind it finer.
* To make sure your mixture is not too wet (ingredients can vary in moisture), and holds in frying, pan fry one ball before forming all the balls. If it does break, add 2-3 Tbs of flour (gluten-free if needed), mix well and form the rest. The Falafel with the flour will be a bit denser and heavier, so it’s best to avoid this option, if possible.
* After experimenting with both frying and baking the mixture, I came to the conclusion that the fried version is tastier by far. However, the baked version has its advantages, so I suggest to try both and decide what suits you best.
* For best results, fry or bake the balls just before serving, and serve them piping hot.
* As said above, there are many versions for this dish, so feel free to mix and match your own with different seasonings and herbs.
Makes: about 30 (1/8 cup size balls)
Soaking time: overnight
Prep time: 20 minutes
Resting time: 30 minutes
Frying time: 4-5 minutes, OR – Baking time: about 20 minutes
Ingredients:
I cup dried chickpeas
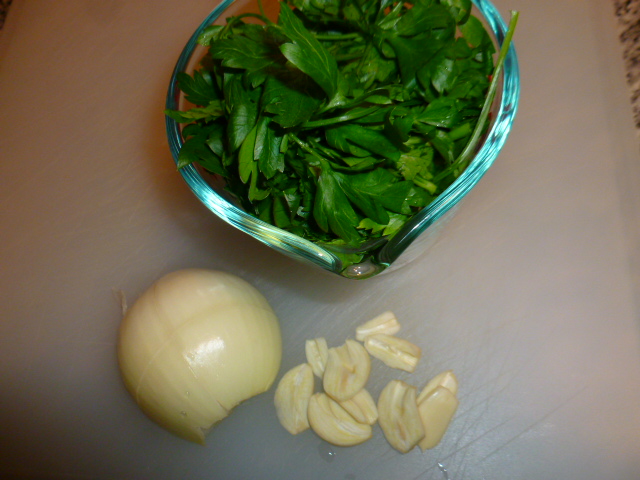
4 garlic cloves
½ medium size onion
1 ½ cups packed parsley and cilantro leaves
1 tsp salt
1 tsp ground black pepper
1 tsp baking powder
1 tsp cumin powder
1 tsp Harissa paste
Oil for deep frying (I use safflower oil), or oil spray for baking
For serving (optinal): lemony Tahini sauce (check in THIS POST or THIS POST for the recipe)
1. Place the chickpeas in a large bowl and cover with water. Let soak overnight (change the water once during this time), until the beans have doubled in size. Drain and keep at room temperature while gathering the rest of ingredients.


2. Place the drained chickpeas with the garlic, onion and herbs in a food processor bowl, fitted with the metal blade. Process to a fairly coarse (or as fine as you want it) mixture. (Don’t be tempted to add more onion/herbs, as the mixture will end up too wet to fry.) Transfer to a bowl and add the rest of the ingredients. Mix well, squeezing the mixture with your hands. Taste and adjust seasoning if needed. Cover the mixture with plastic wrap and let rest for 30 minutes.


3. Line a 1/8 cup with plastic wrap. Place a bit of the mixture in it, and press it tightly. Release from the cup and place on a plate lined with plastic wrap. Pan fry one ball, to make sure your mixture is not too wet and holds. If it does break (ingredients can vary in moisture), add 2-3 Tbs of flour (gluten-free if needed) to the mixture, mix well and repeat forming the balls with the rest of the mixture.


4. To deep-fry: preheat the oil on medium-high heat, in a medium size pot, or a deep fryer. Fry a few balls at a time and fry for 4-5 minutes, until they are dark-brown on all sides. Take out with a slotted spoon and serve immediately.


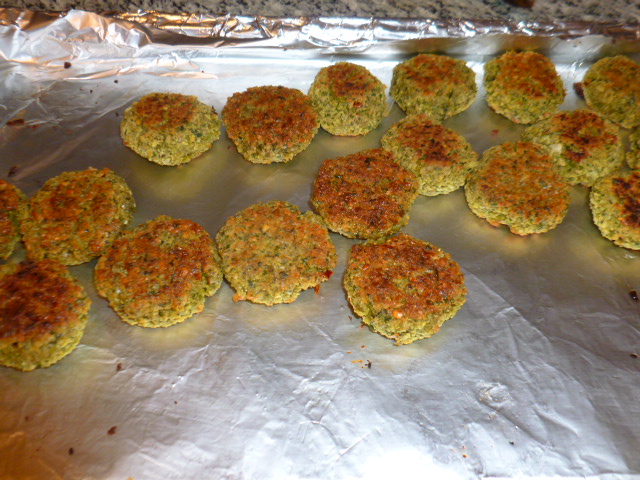
5. To bake: preheat the oven to 430F (220C). Line a baking pan with aluminum foil and spray with oil. Add the prepared balls and spray them with oil. Bake for about 10 minutes, or until the bottom is brown and crispy. Turn to the other side and bake for about 10 minutes, until this side is brown and crispy as well.
Serve immediately.


I really like this recipe! I’m keeping it and will definitely make them. We really enjoy falafel and I have never made it from scratch before. This recipe is really nice with the parsley/cilantro and harissa paste. Glad you shared it, thank you!
LikeLiked by 1 person
Glad to hear! 🙂
Homemade Falafel is really not difficult to make, and it tastes so much better when freshly made. I hope you’ll enjoy the results and I’ll be happy to hear your comments. 🙂
LikeLike
I’ll report back. I was actually surprised when I read your recipe that it seemed so simple!
LikeLiked by 1 person
It really is! 🙂
LikeLike
Crispy and lemon . . . how can you go wrong?
Virtual hugs,
Judie
LikeLiked by 2 people
My favorite combination as well! 🙂
LikeLiked by 1 person
looks deliciously yummy~
LikeLiked by 1 person
Thank you! 🙂
LikeLike
LOVE FALAFEL.
LikeLiked by 1 person
Me too! 🙂
LikeLike
Reblogged this on Toward the within… and commented:
Need this in my life…
LikeLiked by 1 person
Thank you! I’m glad you liked the recipe. 🙂
LikeLike
They look delicious! I have to try them out one of these days !
LikeLiked by 1 person
Thank you! I hope you’ll enjoy the results. I’ll be happy to hear your comments. 🙂
LikeLiked by 1 person
Yum Ronit…your recipe looks so simple. I love falafel and now you’ve inspired me to try.
LikeLiked by 1 person
Thank you Anna. I’m glad to hear! 🙂
I hope you’ll enjoy the results and I’ll be happy to hear your comments. 🙂
LikeLiked by 1 person
Definitely trying this!!
LikeLiked by 1 person
Thank you. Glad to hear! 🙂
LikeLike
Lovely. 🙂 I love the step by step photos. 🙂
LikeLike
Thank you Nell! 🙂
LikeLike
Ronit,
Falafel is an absolute favorite at our house too. Love the green falafel!
LikeLiked by 1 person
Thank you Sandhya!
The green version is really tasty and my personal favorite. 🙂
LikeLiked by 1 person
I will definitely try it soon!
LikeLiked by 1 person
love falafels! you mentioned a baked version…which I have always been wondering about. Did it get crisp in the oven?? I especially love that when fried, the insides are creamy and the outsides are crispy–a delicious contrast!
LikeLiked by 1 person
The baked version was tasty, but not as crispy as the fried version – even though I baked it on high temperature.
It also had less of the lovely contrast you’ve mentioned.
It’s really not a bad option, but fried is still my favorite! 🙂
LikeLike
Great, good to know–will keep this in mind. thank you!
LikeLiked by 1 person
Love this! And so authentic using uncooked chickpeas 🙂 I’ll be saving this one x
LikeLiked by 1 person
Thank you Elaine! 🙂
The authentic version really works best here, as cooked or canned chickpeas balls will break apart in frying, (unless you add flour, which makes the Falafel heavier and dense.)
Also the texture will be mushy and not as crispy.
LikeLiked by 1 person
I think that’s where many people go wrong..
LikeLiked by 1 person
I’m a big fan of falafel but generally order them out and have only made a version from – gasp – a mix. I’ve also made them from canned chickpeas with some flour added – and shallow fried them – but then they’re not really falafels at all then are they – more like chick pea patties. I’d really like to try these.
LikeLiked by 1 person
You’re right, Lindy. The cooked/canned chickpea version is not the same. And the mix is even a more far-fetched option.
The one here is really not hard to prepare, expect for the pre-soaking part, that requires a bit of planning. 🙂
LikeLike
I love falafels…so delicious!!! And this is a very nice version with herbs and chickpeas…
LikeLiked by 1 person
Thank you Serena! 🙂
It is my favorite version, as the herbs add lots of freshness and flavor, and make the falafel less heavy.
LikeLike
Oh yes, they must be really delicious!
LikeLiked by 1 person
Wow.. Looks tempting!! 🙂 my favorite recipe 🙂
LikeLiked by 1 person
Glad to hear! Thanks for commenting. 🙂
LikeLike
Thanks for the step by step process for making the falafel, Ronit. I enjoy them but have never tried making my own.
LikeLiked by 1 person
Thank you Karen! 🙂 I’m glad to hear the photos are helping.
LikeLike
Falafels hate me!! The dissolve the minute they hit the oil so I will have to try your recipe. Love the pics!
LikeLiked by 1 person
It could happen if your mixture is too wet. I suggest trying to fry one ball and if it breaks, to add 2-3 Tbs flour (can be gluten-free if needed) and see if it helps.
Now that you’ve mentioned it, I will add this “warning” to the recipe, just in case… 🙂 Thank you for pointing this!
LikeLike
Damn deliicous cute looking finger bites!!!
LikeLiked by 1 person
Thank you Dedy! 🙂
LikeLike
Reblogged this on dawnspitfire's blog.
LikeLiked by 1 person
Thank you for re-blogging! 🙂
LikeLiked by 1 person
Perfect and delicious
LikeLiked by 1 person
Thank you! 🙂
LikeLike
LOVE Falafels 🙂
LikeLike
Same here! 🙂
LikeLiked by 1 person
// Awesome and goes well with small kitty parties //
LikeLiked by 1 person
Thank you! 🙂
LikeLike
I’m glad to see your falafel experience was a good one, and that my tips were helpful.
Thanks for the link! 🙂
LikeLike
Glad to see your falafel project went well. Thanks for the link! 🙂
LikeLike
love falafel , saving this recipe for future!
LikeLiked by 1 person
Thank you Nisha, I’m glad to know. Hope you’ll enjoy it. 🙂
LikeLiked by 1 person