

 After a few lengthy recipes, I’ve decided it’s time for something a bit quicker and easier to make. My initial idea was to bake a simple pear-ginger cake, but then I’ve found these lovely kumquats at the store – and decided they would fit perfectly in the cake.
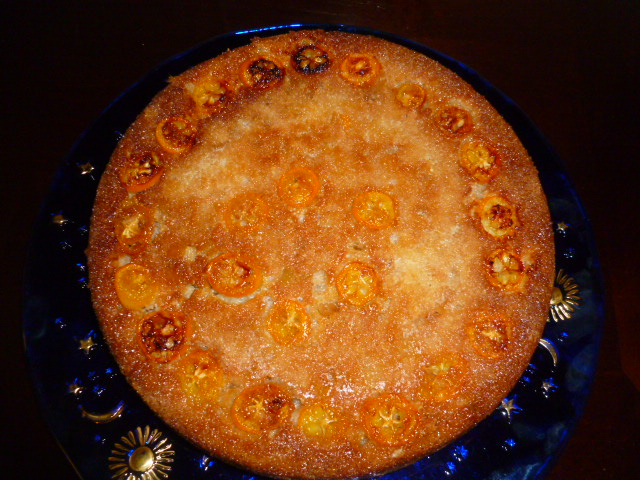
So, even though I ended up complicating the simple recipe a bit, the result was definitely worth it. I believe “festive” is a good word for describing this fragrant, colorful and moist cake. It is just perfect for this time of the year, or for any other festive occasion. Try it and enjoy.
Makes: 12-16
Prep time: 30 minutes
Baking time: 1 hour
Ingredients:
For the kumquat/sugar layer:
½ stick (50 grams) butter, soft
1/3 cup sugar
10 kumquats
1 Tbs chopped candied ginger
For the batter:
2 ripe but firm Bosc pears
1 Tbs fresh lemon juice
1 inch (2.5cm) piece of fresh ginger
2 eggs
1 cup whole milk
1 cup sour cream
¼ cup oil
1 1/3 cups sugar
1 cup white flour
1 cup whole wheat pastry flour (or spelt flour, or white)
1 Tbs baking powder
¼ tsp salt
2 Tbs chopped candied ginger
1. With a sharp knife, slice each kumquat into 4-5 slices. Carefully remove the pits and set aside the center slices. Roughly chop the end slices and set aside.
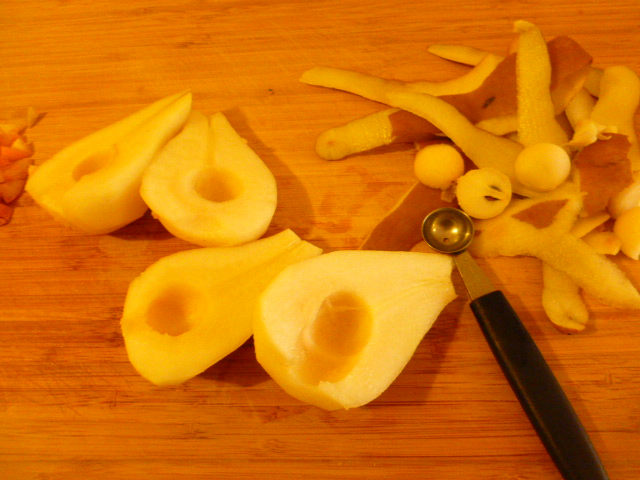
2. Peel and core the pears and cut into small cubes. Place in a bowl and add the lemon juice.
3. Peel the ginger, grate finely and squeeze the juice into the bowl with the pears. Discard the pulp.


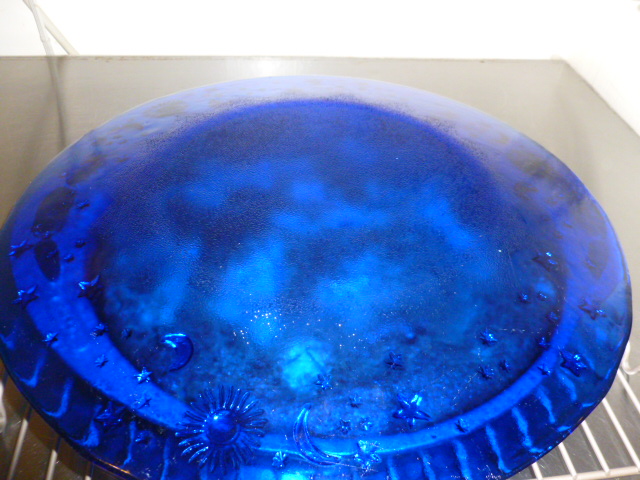
4. Preheat the oven to 350F (175C). Spread the butter evenly over the bottom of the pan and sprinkle ¼ cup sugar on top. Place the kumquat slices around, add 1 Tbs chopped candied ginger. Keep in the fridge while preparing the batter.


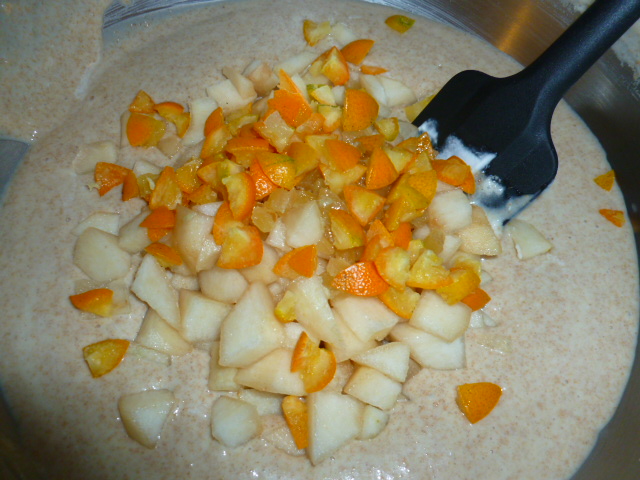
5. In a large bowl, whisk together the eggs, 1 1/3 cups sugar, milk, sour cream and oil. Add the flour, baking powder and salt. Mix to a smooth batter. Add the pear cubes with the ginger juice, the chopped kumquat and 2 Tbs chopped candied ginger. Mix briefly and pour carefully over the prepared pan.


6. Bake for 1 hour, or until a toothpick inserted into the center of the cake comes out almost dry.
7. Transfer to a rack and let stand for 1 minute. Place a large serving plate on top of the pan and carefully, using oven mitts, (the pan is still hot!) flip the cake over onto the plate, so that the kumquats layer will be on top.


Let cool on a rack until the cake reaches room temperature before cutting.


So delicious!
LikeLiked by 1 person
Thank you! 🙂
LikeLike
And me just starting breakfast! Unfair – that looks so good that I am tempted to lick the screen just to get the “bite” of those kumquats. ‘Twas nice when I had access to a tree of these lovelies in Florida, but now they are rarely seen here in the desert.
LikeLiked by 1 person
LOL I hope the screen tasted as good as those kumquats! Though I’m sure fresh ones off the tree are so much better than store bought ones – it’s not an easy competition! 🙂
LikeLike
Love, love kumquats! Especially candied kumquats. What a great way to put them to work in a cake.
LikeLiked by 1 person
Thanks! Kumquats are indeed such a lovely fruit, fresh or candied. They added a lot of flavor and aroma to this cake. I will definitely make it again. 🙂 .
LikeLiked by 1 person
Looks wonderful ..I need one piece 😉
LikeLiked by 1 person
Just grab and take one! 🙂
LikeLike
Ok thank you 🙂
LikeLike
Your welcome! 🙂
LikeLike
Love the idea of a pear cake, Ronit, and you’ve really taken it to another level adding the ginger and kumquats. It must be delicious. 🙂
LikeLiked by 1 person
Thank you John! It was quite delicious indeed. Pars go so well with ginger and the kumquats added the acidity they lack. So on the whole, not a bad one! 🙂
LikeLiked by 1 person
I don’t eat kumquats, but I believe a cake will be lovely with them. Lovely idea! 🙂
LikeLiked by 1 person
Thank you! 🙂
LikeLike
Your cake sounds delicious. I used to have kumquat trees right outside my kitchen door when I lived in Florida. Unfortunately, I haven’t seen them at our markets here in New Hampshire.
LikeLiked by 1 person
Thank you!
It must have been nice to have such a tree at your kitchen door… 🙂
LikeLike
It was…they are such a pretty tree even without their fruit.
LikeLike
This looks great. Just yesterday I was watching a recipe which used the caramel at the bottom. It made the cake very moist. This looks easier to make and bake. Such lovely flavours too..I need to try the ginger!
LikeLike
Thank you! This version of upside down cake is indeed easier and quicker to make than with caramel. You can also check out the version with rhubarb I have posted. It also turned out very tasty! 🙂
LikeLike
have never cooked with kumquats but I love ginger so may have to try this.
LikeLike
Kumquats are great in cooking and baking and I’ve found from this cake they go very well with ginger. I hope you’ll enjoy the results like I did 🙂
LikeLike
And a co-worker just gave me a batch of kumquats from their garden, its fate!
LikeLiked by 1 person
Can’t fight fate! Good luck! 🙂
LikeLike
Lovin upside down cake, my mom used to made a pinneaple and mandarin orange upside down cake….
never add sugar on it, what a great invention!
i guess it’s gonna be a best caramelized layer then!
Happy New Year my friend!!!
LikeLike
Glad my post brought up good memories for you of your mom’s cakes. 🙂
I too love upside-down cakes with all types of fruits. Besides this one, I have posted here a recipe for Rhubarb upside-down cake, and you’re welcome to check it out.
https://ronitpenso.wordpress.com/2013/06/21/upside-down-rhubarb-cake/
The sugar adds a caramelized layer that makes the tasty cake even tastier…
Happy New Year and all the best wishes to you too! 🙂
LikeLike
I made an caramel-apple pie the other day and decided at the last minute to add some thinly sliced kumquats to it. This was the first time I’ve cooked with kumquats – they came out a lot less tart than when fresh. I found it made a nice balance to the sweetness of the caramel and the apples.
http://th3bak3rman.wordpress.com/2014/04/07/apple-pie-with-fig-and-citrus/
LikeLike
Yes, they work well with caramel.I liked the result and will definitely use them again once they’re available.
I liked the addition of cheese in your pie! Great idea! 🙂
LikeLike
I thinly sliced the cheese, so that it wouldn’t be overpowering. I could barely taste it, though, which meant I needed thicker slices 🙂
LikeLike